Costumes, Cards and Steampunk Adventures! Tuesday, Oct 17 2023 

Hello faithful readers, and new friends!

I last checked in with you as summer was just beginning to rear her shaggy head, and I have to tell you… it has not slowed down one bit!

For those first seeing this blog, I began Repleating History over a decade ago as a way of keeping myself accountable for documenting my process as I designed clothing, costumes and cosplays. I’ve been making all of those things for nearly three decades, and have won a good many costume contests (and judged a few), organized and participated in fashion shows (including Fashion Week here in Milwaukee), been an actor at the Bristol Renaissance Faire for a few summers, been an active member in the tri-state area Steampunk community for over a decade, and two years ago I wrote a book on costuming– mainly focused on my Steampunk-Victorian designs. I also have a degree in English and Fine Arts, and a master’s degree in Education, which informs a lot of my creations…

I believe in continually challenging myself and learning, and I wrote my first book in the hopes of encouraging others to do the same, and to hopefully make parts of costuming easier and more entertaining, while using gorgeous images to illustrate the chapters. When possible I fund new projects on my own, but once or twice a year I’ll run a crowdfunded project to help cover initial printing costs for a variety of items I’ve designed; a card-matching game to improve memory, a deck of cards featuring original sketches and vintage/obscure fashion terms & definitions, and a steampunk murder mystery game (for 2024)!

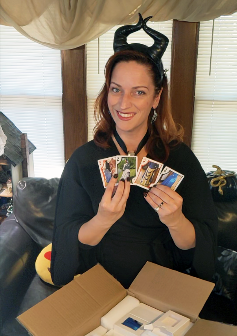
I kicked off the summer with a Kickstarter for a deck of fashion-focused (my brand of edu-tainment) playing cards that I designed, utilizing a ton of never-before-seen images from various photoshoots, and commissioning 36 original sketches from a madly talented artist in Madison, WI!

Well those cards have just recently arrived, and they turned out great!

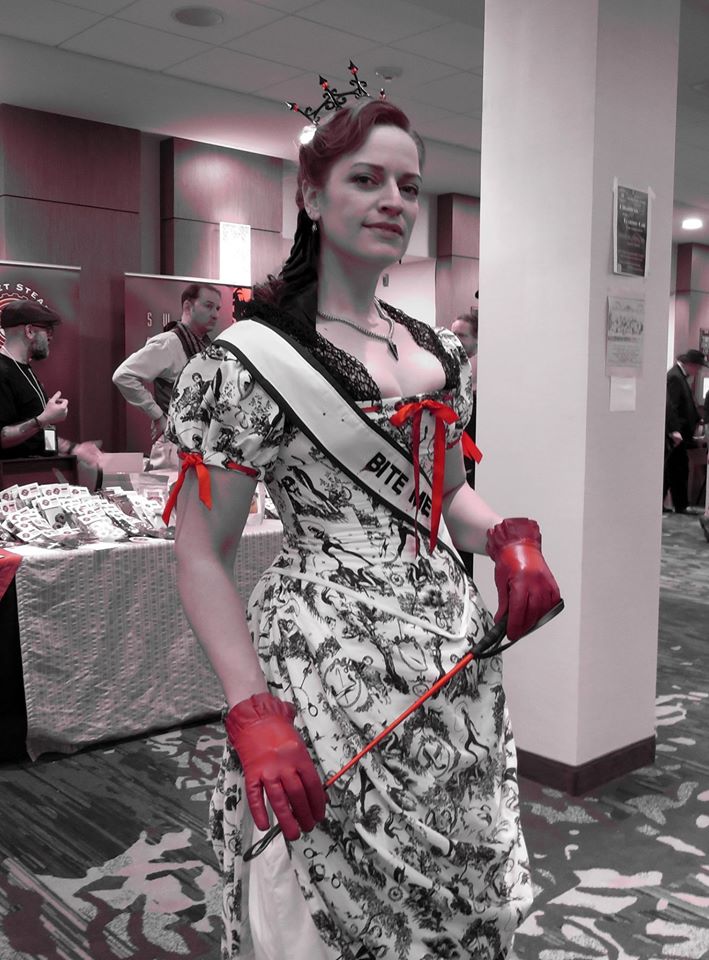
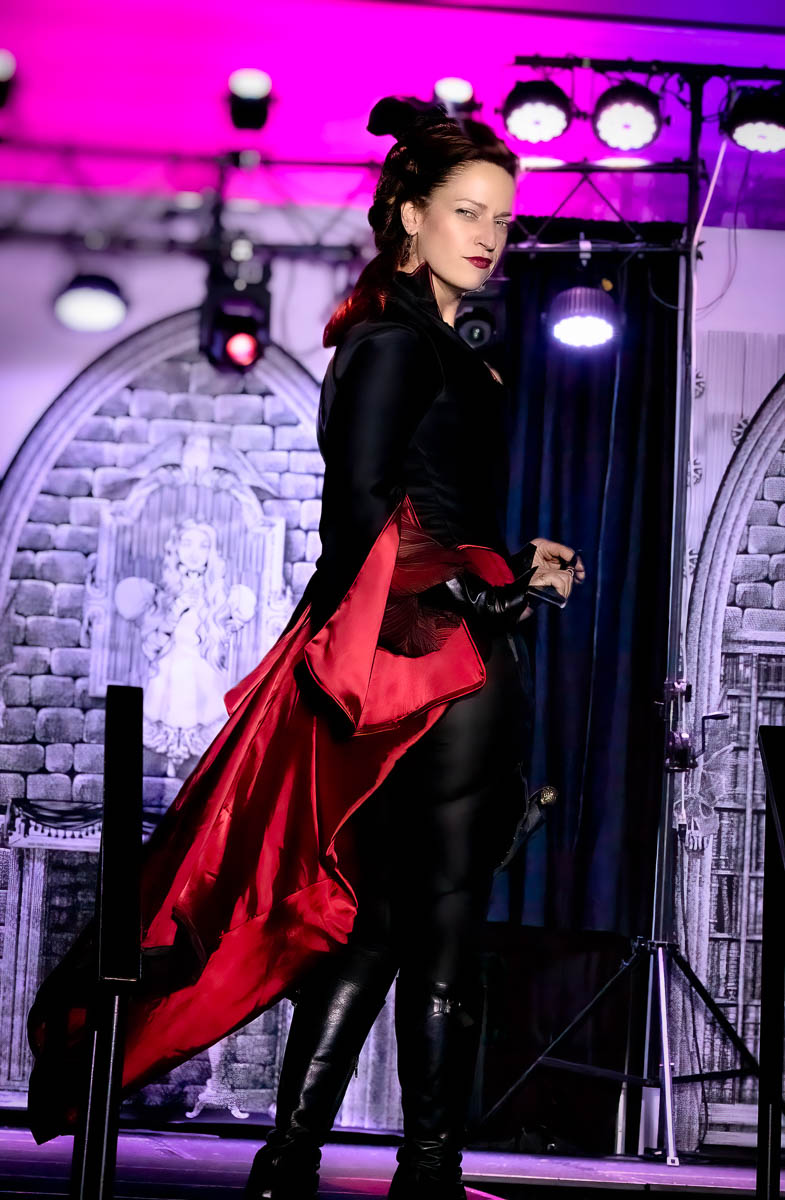
The summer closed after a mad slew of conventions and vending opportunities in which I slung my goods. (I also finished a super-fun crossover of Starbuck and Bo-Katan, and made Katee Sackoff grin when I dramatically opened the curtains at the photo-op)

I also took time over the last two months for more original creations, to design new banners for my business, to do some much-needed housecleaning in my life in general, to finish one of two photoshoots, and to ramp up plans for the new book! (more on that soon!)

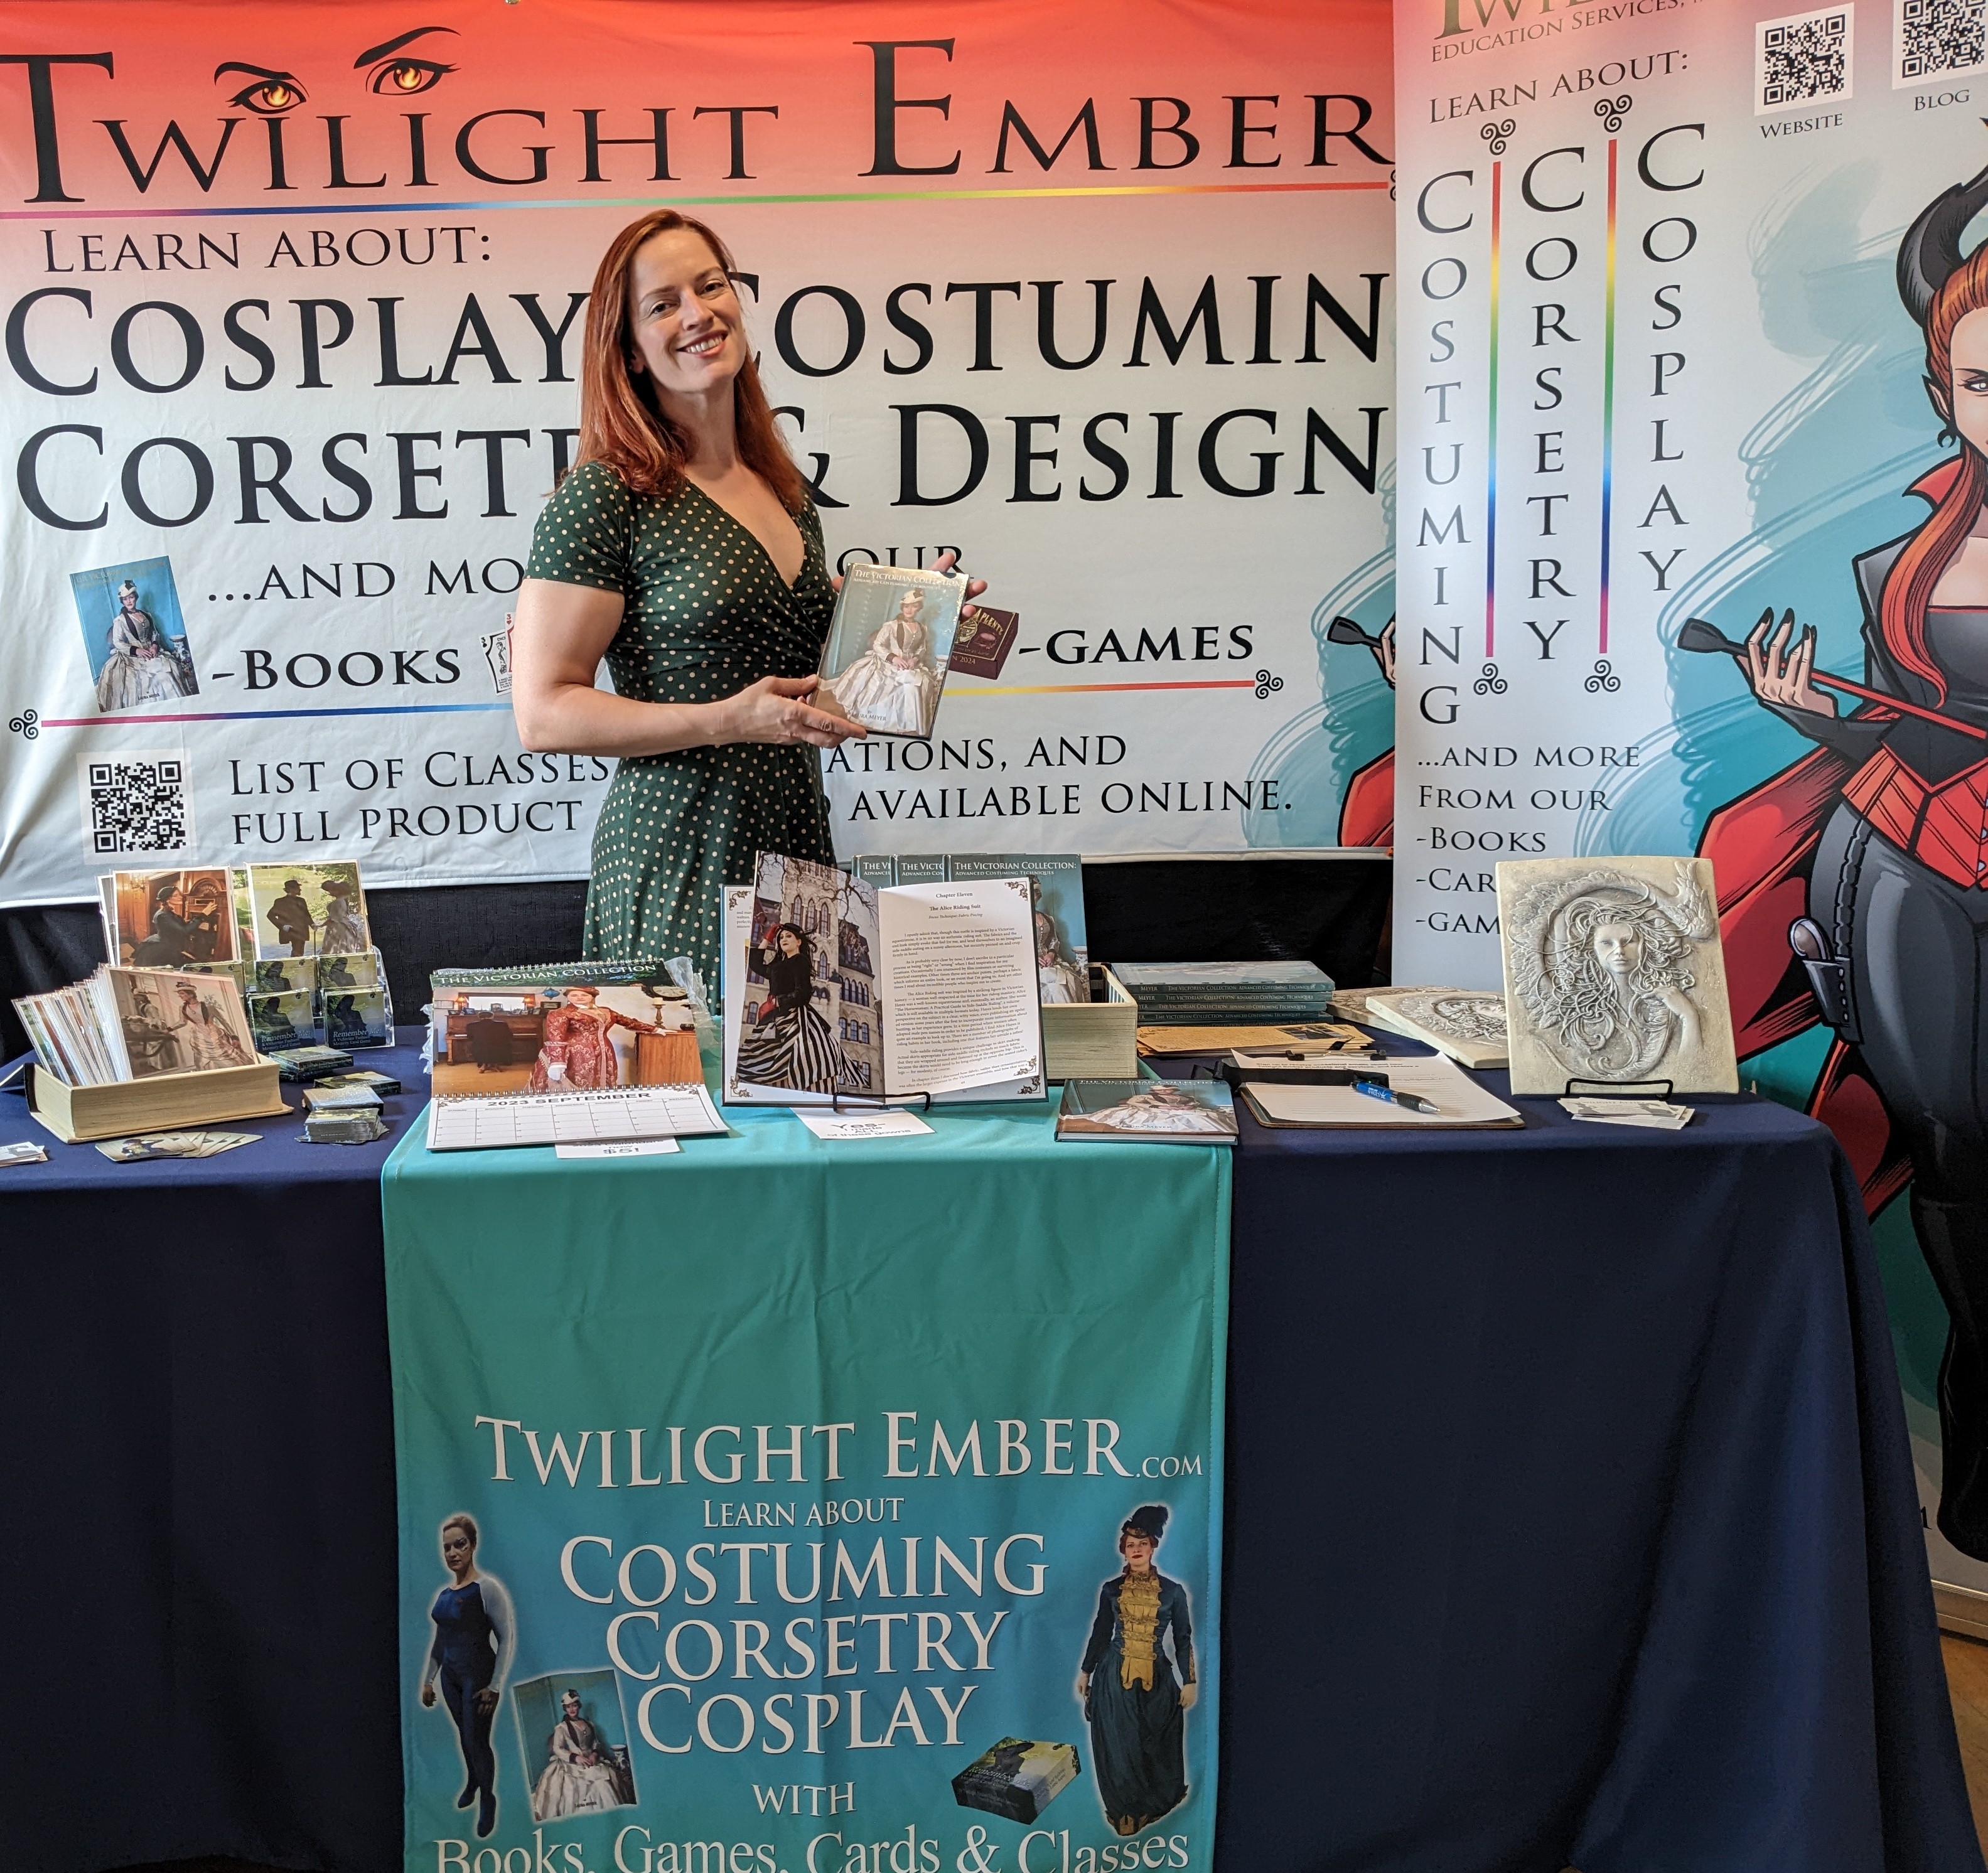
All three banners are new, and work for booths of different sizes and setups!
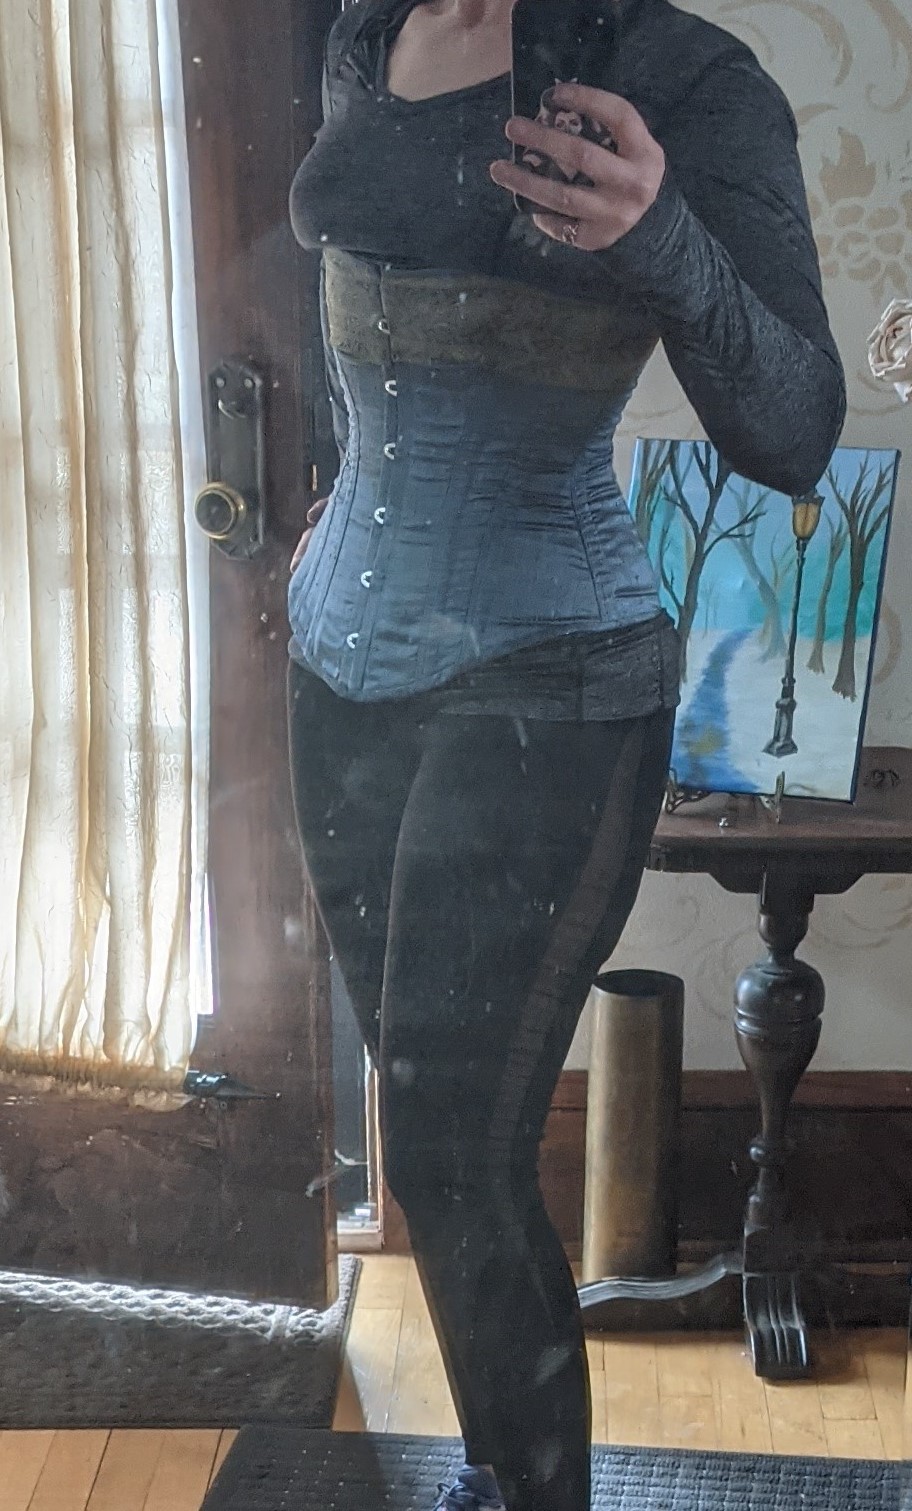
Also, yes, I work out ๐Ÿ’ช

And NOW…. I’m busily gearing up (haha, see what I did there?) for TeslaCon, the largest and longest-running immersive Steampunk convention in the US! If you find your way over to Madison during the first weekend of December, you will find much to entertain you!

For one, I’ll be launching the Kickstarter for my SECOND book, “The Halloween Collection: Costume and Cosplay Techniques”!! (click!)

What will be at my TeslaCon table?

  • My book “The Victorian Collection: Advanced Costuming Techniques”
  • A bookmark set all about women fashion designers in the Victorian era!
  • My fun and fashionable greeting cards
  • Fashion-focused Card Games
  • Fun corset and fashion-themed stickers and pins
  • AND an activity booklet featuring the article I wrote on steampunk costuming, as well as art contributions by a few artists….

….what artists, you ask? Well, the aforementioned artist who created the sketches for my playing cards, Katie French!

ALSO contributing will be the international Steampunk author and fashion icon, Bonsart Bokel!


Bonsart created the podcast Radio Retrofuture, and has published a number of stories, comics and coloring books set in his compelling “Association of Ishtar” steampunk-with-a-Lovecraftian-twist universe!

and probably a dozen more things I don’t even know about- to say this man is immersed in the Steampunk community is a huge understatement. In fact, his newest project, a new Association of Ishtar story, is due to kick off with a launch party on October 22, HERE.

If you’re a steampunk fan, it’s definitely worth checking out! Bonsart has had me as a guest on his podcast a few times, and I always enjoy talking with him about writing, games, conventions and of course… steampunk!

The TeslaCon season will also bring more fun blog posts coming up… outtakes from the photoshoots for the new book, a new ballgown I’m making for the Saturday night ball, and lots of costuming posts related to the book as I go along!

Keep an eye on “Repleating History” as we head into the colder months….

2022-23 Madness-Dresses, Books and Cons, Oh My! Friday, May 19 2023 

Hello faithful readers (both of you ๐Ÿ˜‚), I’m back for a it’s-been-a-crazy-year wrap-up!

My books finally arrived in August, not long after my last post about the summery outfit I made without a pattern.

I promptly hied myself off to a convention, schlepping my books with me, to test out the appeal, and my Spielโ„ข.

The fall was a blur, really, consisting of three more cons of various types, and then the holidays!

I designed 2 dresses completely from scratch and finished/redesigned two that were partially complete, for the 2022 TeslaCon fashion show. I had amazing models, and a great time! Some photos below, showing the beetlewing embroidery I did on one of the new creations, as beautifully modeled by the proud owner of the gown-

My outfit and the black and gold were not new, but had never been on a runway before, so I allowed it ๐Ÿ™‚

The new year came before I knew it, and I whipped out a 2023 Victorian fashion calendar… YES, I have a 2024 one in the works, with more interesting features, in fact! stay tuned…

I DO have an imminent project that’s pretty fun- click HERE to get the cards, once the campaign launches!

Other than that, I DO plan to have a couple photo shoots this summer, launch a campaign for the 2024 calendars in a few months, my SECOND book a couple months after that, and work on the steampunk murder mystery game for 2024.

Besides going to conventions and making a couple new outfits for TeslaCon 2024, AND a new cosplay (Bo-Katan!) of course!

Hopefully my shame at neglecting you for so long will help me post more often, especially since I’m excited to give you updates about the new book… “The Halloween Collection: Costume and Cosplay Techniques”.

Promise!

XOXO

Laura

Sans Patterns- Tiki Wrap Pants and Top Wednesday, Aug 10 2022 

I had a party approaching with a very particular theme… “Peace Through World Domination”, and also Tiki, as all these world-dominating hopefuls were meeting on a remote tropical island. Naturally.

(Every time I type out this theme, my brain wants to write “World Peace Through Domination”. Maybe that’s just me. ๐Ÿ˜ˆ)

At any rate, I had the perfect outfit, as seen here.

Until, that is, the weather forecast was finalized for the day of the event…. 90+ sunny, hot degrees. Now, I’ll wear ridiculous amounts of fabric in ridiculous temperatures at the Renaissance Faire (proof!), but those are made with natural fibers, overwhelmingly, and that really does make a difference.

Allow me to set the scene…

The party is tomorrow. I’m having cup of coffee 2 of 5, and have just confirmed that it will be Satan’s-Armpit-Hot all day long. Hmm. Other “world domination” appropriate costumes I have are either just as warm, or the wrong type of domineering for this type of party.๐Ÿ˜

However!

I recall that the other part of the theme offered up is Tiki! I have a couple old Marilyn Monroe style flared halter dresses I made in a Hawaiian flower pattern, but that seems too easy. Apparently. Because I decide, instead, to grab my fabric store coupons and go shopping! A few years ago, a fabric pattern made the rounds among some friends on Facebook; it featured sweaty, shirtless, hunky pin-up style cowboys in various states of cowboying, and was tremendously amusing. At the time I looked up the fabric and found the name of the designer, but alas I had nothing to use it for. (An argument could be made that I should have FOUND a use.) So I delve back into the printed cottons and rediscover his name; Alexander Henry. I know that the fabric store “in stock” accuracy is total garbage, so I just head out to see what I can find.

They DID have variety. A number of pin-up patterns and some vintage tattoo styled patterns caught my interest. I came close to landing on a zombie pin-up pattern, but the base color was a very drab brown. On top of that, the scale of the pattern was two to three times larger than most of the others. So I landed on a bright, summery blue with a bevy of classic pin-up ladies.

The question was then, how would I make the outfit I wanted? I recalled having seen pants that tied in back and in front, like spartan warrior pants (kind of, okay?), but I couldn’t find any patterns of just what I wanted.

So, I make it myself.

I found a couple pictures online that I used as a jumping off point to draft a pattern. Well, perhaps “draft a pattern” is generous. I just laid out the fabric, pinned the layers in place, and marked where I was going to cut it.

Note– Yes! I prewashed the fabric, especially since it was 100% cotton!

I liked the look of the style on the left, but I really wanted the double tie style. The only thing that really needed measurement was the crotch, from front to back. Then I added on 2 inches for adjustment and ease. I made sure the legs were more than long enough, and started with 2 squares, folded into rectangles. Each rectangle would get one half of the crotch measurement, with a slightly deeper curve on the booty side. Essentially, the pattern would look like this:

The crotch of the pants are the only point where the two sides are sewn together. I would be careful with the curve of the crotch- you can always cut out a deeper scoop if you need it, but it’s more work to make an overly saggy crotch fit again.

I tried the pants on at every point, pinning the tie strips in place before turning in & stitching the edges and hem of the pant pieces. I employed the help of my partner in crime, and life, in pinning the hem, and voila!

The top was even easier, believe it or not. I measured the width from the bottom of my sternum to my underarm, added an inch and doubled that. That was the width of a tube I sewed, right sides together. I made it the length of a measuring tape wrapped around my neck, across my chest and meeting in the center of my back, just as I planned the to wrap the top.

I folded the tube in half, marked the center and pleated it twice to reduce the width where it would sit at my neck. I cut a slice out of the center at a slight angle so it would wrap around my neck with less bunching. Then at the ends of the tubes I did two more pleats and inserted some extra length from the waist tie strips. Finished all the edges, and done! Of course, you’ll want to do a couple of fit checks in there, but this was the fun, breezy and comfortable result:

I will note that 100% cotton (or another natural fiber) is a great choice for this kind of project, where you don’t need stretch and the design is pretty straightforward. With all the quilting cottons, you’ll also be guaranteed a fun selection of patterns.

Coming up this fall will be lots of great posts as I create and update some sumptuous looks for the Teslacon Fashion Show!

Until then, ๐Ÿ”ฅ๐Ÿ’›๐Ÿ”ฅ

Laura

Finishing a Corset: Busks and Binding and Grommets, Oh My! Wednesday, Jun 8 2022 

Hello friends and fanatics!

This blog has been pretty quiet on the “making” front, but if you’ve been paying attention, you know that doesn’t mean I haven’t been extremely busy on the creative end of things! Just over a year ago I took my business full-time, and am still working to get that to a comfortable point, inasmuch as self-employment can be comfortable. Besides that, I wrote a book in the last several months, and raised $10,000 to fund the initial publication run!

So, I have NOT been snoozing on the job!

However, those update posts, as exciting as they are for me, don’t provide much sustenance for my fans with an appetite for sartorial creations (or, at least until the book arrives! If you would like to check out “The Victorian Collection: Advanced costuming Techniques” but missed the Kickstarter, you can pre-order a copy here!)

Apologies for the mottled vintage mirror surface…we’ll ALL be mottled at 96 years old!

I have made a few things- I’ve *started* more than a few- and I present a bit of a technical post here for you. You’ll see THIS corset through the finishing process!

The beginning of the corset-making process IS extremely important. It is essential to get cutting accurate to your careful measurements, to flatline your interlining, to allow for the thickness of fabric in how it will affect final measurements, and to stitch your seam allowances consistently.

However. It is the finishing of the corset that is usually considered intimidating. So I’m going to review the last few processes in the creation of a corset I recently made, and this post will feature something new… (drumroll, please!)

Video! Yes indeed, you can now see my work and the remnants of my manicure in live action!

Let’s begin. You’re joining me at the point where all my pieces have been cut out and I have flatlined the outer fabric, the interlining and the lining together. I decided to have the boning channels on the interior of this corset rather than sandwich them between two layers of interlining, or a coutil exterior and interlining. I have sewn all the pieces together, zigzag stitched the raw edges, clipped and pressed them, and this first image shows how I stitched the seams down initially on the left, and where the boning channels are applied along the seams on the right.

I have not removed the flatlining thread from some pieces yet- note the large stitches in an easy to see color, making removal easy.

The insertion and sewing of the busk is a part of the finishing process, and must be done before the center front pieces are sewn to the rest of the pattern pieces. Similarly the center back of the corset, if you look closely, is sewn down the center with right sides together before being joined to the rest of the pieces. You’ll see why shortly!

To insert the busk, the center pieces must be sewn differently depending on whether you’re inserting the loop side or the hook side. With either side, you’ll lay the busk along the planned seam allowance with the pattern pieces laid right sides together. It’s good to do this with both sides at the same time, so you can be sure your markings are the same distance from the top and bottom. I usually put the hooks on the right side, but that’s a personal preference. Use chalk or a marking pen to mark the seam allowance along the hook side, and mark the position of each hook as well. On the loop side, mark the seam allowance right up to and around the loops…. You will sew RIGHT up to where each loop starts, backstitch for strength, then start again (backstitching again) on the other side of each loop. This leaves openings for the loops to go through when you turn the pieces right side out.

Once done sewing, press the seams open, then flat, ready for the busk. Insert the loop side of the busk into the appropriate fabric, pushing the loops through the openings you sewed. Use pins set perpendicular to the busk and get it as close and evenly placed along the edge as possible. On the hook side, you’re going to use an awl to make openings in the fabric for the hooks. At each marking, you’ll push the awl through and wiggle it to create an opening. You don’t want to cut a hole for the hooks, as that will weaken the fabric and leave you with fraying ends and ever-widening holes from being a stress point. I will even use Fraycheck on the holes once the hooks are inserted (do a stain test against your fabric with it ahead of time!)

This busk-adjusting, hole-wiggling part can be one of the most frustrating, so I made a short video showing how I approach it. Enjoy!

The process of busk insertion and making the hook openings.

How it turned out!

SO! The busk is done, you’ve stitched along those perpendicular pins, it looks fantastic. Great! that’s ONE finishing process done! Before moving on to the top binding, I stitched in two rows of boning channel at either center back, about 5/8″ from the edge. Why? Because there are sufficient layers within that first 5/8″ to encase the 1/2″ steel bone along the edge, but then I want reinforcement for the grommets, and another steel bone on the other side of the grommets. There are several ways you can do this reinforcement, even to add a couple inches to the interlining when cutting your pieces and already have it sandwiched in. I just chose this method, this time. You can see these two boning channels very clearly in a couple of the upcoming images.

At this point, I would stitch across the top of the corset. Then, taking a strip of binding tape or fashion fabric, I lay it good sides together long the top edge of both corset sides. Zigzag stitch for security, and then I double fold it over and pin it to the inside of the corset. Sometimes I will machine stitch this from the other side, but for this corset I chose to hand-stitch the binding. It tends to look neater, and I had a bit more maneuvering to do with a band of metallic trim I added to the front. Once the top edge is done, I insert the boning from the bottom, stitch along the bottom edge and repeat the same process from the top binding.

The last step is the grommets. Use two part grommets, and the right tools:

Here you can see the inner steel bone (encased within the seam allowance of the center back), the channel which will house the grommets, and the outer steel bone channel. All of this support is important, as this is a major stress point of the corset. Also, you just really don’t want any bunching of fabric at your back.

Placement of the grommets is a personal choice, but I definitely recommend measuring and marking ahead. My first grommeted corset was made with grommets 1″ apart, and that seemed excessive for lacing. I now place my grommets 1.5″ apart from each grommet center. I do cut holes for the grommets, as the holes is finished so completely by the closing of the grommet sides…. and because trying to use an awl to wiggle out holes that large would take HOURS. When applying the grommets, I recommend a rubber mallet, but if you don’t have one a hammer works- just always use eye protection!!

At 1.5″ from center, this is the result:

Yes, that is a cat paw.

Some side notes: This corset is intended to be part of a final look, the design of which I have not settled on, so there may be a sequel to this post! Also, I swear I took photos and video from the first half of the creation of it as well, so there may be a prequel!

And finally, I used a vintage corset pattern which I have used previously for undergarments for Steampunk fashion shows, and I forgot that I tend to have a longer torso than the standard vintage patterns I’ve seen. So this pattern was for an over-bust (barely over though), for those noticing the curves on the center front pieces. I chose not to rework the pattern because I’d cut out the silk lining years ago and really wanted to use it.

Even more exciting news! My book is funded! Monday, Jan 3 2022 

And I *would* like to state, for the record, that there are TWO projects that are waiting for me to post them; I have not been sitting on my laurels the last half year!

After officially launching Twilight Ember Education Services (new parent company of the long existing Twilight Attire) this past spring, I’ve done a lot of thinking about the different aspects of the company. There’s the textile lines, consisting of the line of kinky accessories available at a number of adult boutiques and on my Etsy page, and there’s the line of historically inspired costumes on view on this blog page and website, and occasionally available for purchase. Then there’s the educational aspect. I plan to include seminars, presentations and demonstrations like those I’ve given in the past at museums and libraries (and online more recently), but printed educational publications were also a target goal.

Once I established the beginning of a client base for my product line this summer, I began thinking more seriously about what those published offerings might look like (since in-person presentations are still dodgy). I decided to use my line of costumes, specifically the Victorian-inspired costumes I’ve made over the last decade for Steampunk events and conventions like TeslaCon, as the basis for an informational book on costuming! I already had a wealth of images from multiple photo shoots over the years, as well as process photos and notes from this blog on many of the costumes. I decided to combine those two things with practical tips and strategies for approaching some challenging sewing and costuming techniques, and the basis of the book was set.

In early fall I began making plans; coordinating a photographer (the talented Robert Remme!) for new, stunning photos, and gathering information from on-demand publishers. It occurred to me in late September that I could use the Kickstarter platform to help fund the initial print run of the book, and the planning really took off in earnest then.

Photo by Kate Loomis

On November 3rd, from a booth at TeslaCon, I launched the Kickstarter for The Victorian Collection: Advanced Costuming Techniques! By the end of the weekend we had reached nearly 25% of the funding goal, and were halfway by the end of the first week. It was my first Kickstarter, and very exciting! The campaign finished in the beginning of December, well over the funding goal.

Beyond hitting the goal, I also determined that if I went with offset printing, I could order 40% more books for the same cost. Bonus!

A reasonable facsimile of the final product!
Photo by Robert Remme

Between finishing the photography and editing, then final layout, I anticipate that the books should arrive in April (allowing some time for what now seem to be usual delays in shipping times). I plan to sell the books online as well as in person at two, perhaps three, Steampunk/costuming conventions a year. It has been quite a ride, and I couldn’t be more excited for the future! (Yes, another book, but not until I have this one done and printed.)

If you missed the Kickstarter and would like to purchase a copy of the book, you can pre-order one here!

Exciting News! Friday, Apr 30 2021 

It has been a while.

Miss me? I missed you. :*

And, in fact, I have a project to write about, despite the great black hole of creativity that has been the pandemic for many of us.

But, first, I have exciting news!

And I’ll be streaming LIVE (https://youtu.be/iZIIHYTXaek) tomorrow, Saturday May 1 at 1pm CST to discuss this news!

The grand expansion, and what I’ve been working on for the last couple of months! I am expanding Twilight Attire’s product line that has previously been available exclusively at The Tool Shed here in Milwaukee.

Beyond that, I have established an LLC which includes Twilight Attire but will also include offerings of (online and in-person) classes, demonstrations and presentations along a spectrum of topics from historical costuming and corsetry, to kink and fetishwear.

Websites: http://www.twilightember.com http://www.twilightattire.com

Costuming blog: http://www.repleatinghistory.com

YouTube channel: https://www.youtube.com/channel/UC8bo1YpjO1aZxP2jw_OkFUg

Etsy: https://www.etsy.com/shop/TwilightAttire

There is so much to see!I hope you join me for the livestream tomorrow-

Laura

Creativity in the Time of Corona Thursday, Oct 1 2020 

It feels as though it would be oddly appropriate, given the title, to leave this post blank.

…and there’s your preview to what many people have been struggling with the last several months. Social lives have been stunted and we are at home more than ever. Even if we’re working, we may find we have more free time on our hands than usual.

With the exception of many health care workers, of course.

So what do we plan to do with all that time?
We’re going to really dig into cooking for ourselves! Catch up on that foreign language we abandoned on Duolingo! We’re going to work out- a lot! And we’re going to finally do all those fun, creative projects we never seem to have time for!

Hooray!

And then…. nothing. The owl blinks, and sends *another* reminder.

The weights sit. The projects remain on the list. And we wonder what is happening- where is that time going?

Now, this post is *not* meant to be a downer, but I don’t know how it’ll hit you. Just know that the intention (TL;DR) here is to say, try to be kind to yourself, okay?

At the beginning of the pandemic, as a teacher with summer break coming up, I imagined I would have time to complete the most epic of all costume builds… that my creations would be limited only by my resources (teacher salary). And for the first couple months I was making masks to outfit friends and family with, and to donate. And then commercial production caught up with both paper and fabric masks, and the urgency abated.

But the pandemic continued…. and my projects continued to sit, as projects are wont to do when untouched and alone.

My Projects

Somewhat recently, I was able to plan a trip to a sizeable fabric store… by appointment, daytime, mid-week, masked up. And I made a list of the cosplays I would be shopping for. And I was excited! Here’s a pic of my haul:

Leather and silk and PVC, oh my!

Now, a few weeks later, in the midst of online learning with 50 kids who probably aren’t doing any better than the rest of us are, I am wondering if this pile of fabric will serve as inspiration or additional guilt- I have now spent more money on projects that are sitting.

At the moment, it’s in the guilt category, but I am hopeful…
Hopeful that I will stop doom-scrolling, turn off wonderfully distracting games, and convince myself of the value of creating costumes for events that may not happen. Because I love the process, not just the end result, and we have to embrace all the things-and people- we love right now.

There is additional, constant, underlying stress for everyone with the uncertainty and changes in the world, and the U.S. in particular. After several months, we can feel like we *should* be getting used to it, adapting and improving… but instead, it seems to be layering on over itself. We miss our lives from “before”, yet every interaction can feel like an obligation. There are contradictions in how we feel, and what we want, and whether we can even trust ourselves to know what that *is* at this moment in time.
It’s not just you, it IS harder right now.
So, keep plugging away, do your best to take care of you & yours, and try to express your creative side if it feels like that’s part of taking care of yourself.

*Hopefully*, I’ll be adding another post soon.

XOXO

Seven of Nine Cosplay Borg Hand Prosthetic Wednesday, Apr 22 2020 

This February, just before SGS (shit got serious), I was in a position to attend MarsCon, a fan run science-fiction/fantasy convention, in Minneapolis, MN. I hadn’t heard of it before, despite it closing in on its second decade of existence (with separate annual goings on in both Virginia and Minnesota!). cover

I poked around and took a look at attendee images to decide on what costumes I wanted to wear. It is a smaller con, and it was short notice, so I did NOT plan to make a new costume. Keep it simple, right? I decided on the Evil Outfit of Evil, and Seven of Nine.

Cue to me pulling out my outfits and inspecting them for maintenance, mending needs, etc.ย  Evil looks good (it usually does), but I had a rude lesson in how and where to store my accessories when it came to my Seven costume…. the facial prosthetics needed a repaint, and the Borg exo-hand was badly deteriorated. The paint was cracked and flaking off in areas, and the rubber of the glove base had actually begun to disintegrate. Yikes.

old

With some paint I *could* have limped it through a day of wear, maaayybe, but that is not how I costume.

I had one week to make a new glove. After some light research online, I decided to make the second one in the same fashion as I had created the first.

I’ll take you through the process, and end with some finished images as well as a comparison to the one used in Star Trek: Voyager.

glove1

I began with a heavy rubber cleaning glove. I used a smaller size than last time- lessons learned- and used my original as a basis for planning my lines. The glove had a band across the palm, caps over each finger and thumb, and a closure (I used velcro) at the wrist. The lines on the back of the hand extended up the wrist, past where the sleeve of the bodysuit would cover.

The first step, though, was not cutting- another lesson learned. I used liquid latex to create the lines of the glove. Originally, I planned to do layers of latex in order to build a three dimensional effect, but it was so thin and took so long to dry adequately that I gave up after about six layers. THIS time, however, I was using the *same* quart of liquid latex, from four(?) years ago… and it had thickened considerably. So I planned out where my lines would go, and used a toothpick to scoop up the thick latex and lay it down in ropes along the back of the glove. I did three layers, and had beautiful results!

As you can see, the first layer created a good base, and the next two layers I worked to round off the top of the ropes, trying to make them look as much like nano-tubes (I suppose) as possible. Fortunately, because the latex was so old the drying time was likely shorter than it otherwise would have been for the amount I used.

Day three, and it was finally time to cut. I used small scissors first, and then an exacto blade to cut the exo-hand outline away from the rest of the glove. The knife was especially useful for the detail work in the interior spaces. Afterwards I gave it a coat of black Plasti-dip spray, which was leftover from repainting my husband’s Jaime Lannister armor and makes for a great painting base. I did weigh down the edges of the wrist band, as the Plasti-dip made it want to curl in. This effect was actually to the benefit of the project otherwise, as it helped narrow the nano-wires and give a little extra grab onto the finger caps.

I dry-brushed metallic silver spray paint over the raised areas, letting the darker colored recessions do the hard work. I do not know where my gold metallic pen is hiding, so I skipped the bronze/gold accents this time. After that, it was just hand stitching two little squares of velcro to the wrist band, and I was ready to go!

The results were good- I received a number of compliments, and it even stood up to battle!

battle

So, a comparison between the new one, the old one, and the prop from the show:


The image on the right above is from a prop auction, so I believe it is authentic. If I had slowed down, I would have re-evaluated the design of my lines. They should have, in my new version, become more closely gathered and linear along the length of each finger and instead, I made them more random if anything. And my MIA gold pen resulted in the bronze accents being absent, though I can add those in later. Ah, well.

However, the depth and three-dimensionality resulting from the thicker latex and paint job gave a nicer overall look, and possibly a sturdier end product.ย  The fit of the finger caps is more secure than in my original version, which makes for easier wear. The Voyager prop is made of painted foam, and was identified as used, and in fragile condition. No more battles for that prop! Again, I think my only change would be to mirror the “wire bundle” design more closely. Overall, I would say excellent results for a last minute project, though not perfect ๐Ÿ˜‰

PS- For the curious, my repainted prosthetics, a shot of the full Seven of Nine costume with the original exo-hand, and the Evil Outfit of Evil;


I will NOT be storing *this* prop in the basement, btw.

A Romance of Mesh Wednesday, Feb 12 2020 


2406945-KVKPAVNP-7

Not my painting.

It was many and many a month ago,
In an online shopping spree,
That I acquired a fabric, the price so low
T’was unbelievable to me

The Etsy wholesalers- not half so detailed in their descriptions- offered shipping for free.
Yes! This was the reason that, long ago,
in the cart, too quickly-
I placed a mesh far too thin,
And ordered it, sight unseen.

But this mesh, it was lighter by far
than those I’d used previously,
and of those in my closet, you see.

And neither the stars in the heaven above,
not the demons down under the sea
could ever transfigure this net to the weight
of the net that I need it to be.

And so all the night-tide I drape and I sigh
at my dress-form, my dress-form,
for the White Party’s nigh….
at Crucible, west of the city-
at the club west of Milwaukee.
-Me

This is the tragically romantic tale, in poem form, of how I ended up the proud owner of approximately 6 yards of white powernet mesh in two weights that were completely useless for the intended purpose; per-piece sewing that I do for a local (amazing and sex-positive!) sex toy store, The Tool Shed.

Importantly, I am not really a person who wears a lot of white…
So when it came to “whatever will I do with 6 yards of white mesh?”, the answer was of course “Make something for The White Party”, an annual themed evening at the monthly dance event Leather & Lace in Madison, WI. Eight months away, at that point. PLENTY of time.

Fast forward seven and a half months.

And this blog is about the dress I made two weeks before the White Party, 100% draped, and made in two layers of lovely mesh with accents of white lingerie elastic and steel o-rings.

Having worked with powernet a great deal in the past, I knew that it would be perfectly possible to leave the edges unfinished, as it will not fray. In fact, the 4-way stretch makes it more likely that turning a hem under will distort it, potentially ruining a nice clean look.
This won’t be a terribly long post, since there wasn’t much prep, nor much finishing. However, I can give some tips for working with stretch fabrics, and for draping mesh.

First, don’t worry about it being tight on your dress-form; you’ll probably want it that way, since your body compresses slightly and the dress-form does not. With stretchy fabrics, the last thing you want is for it to be loose and baggy. That said, I would not cut down seam allowances until you’ve tried it on and are happy with it.

The dress is made of two layers- the tight sheath dress underneath, and the draped layer with the elastic harness on top. For the sheath dress, I just laid one of the mesh dresses that I already own flat on the white fabric, and traced around it. I added length because I wanted it to reach the floor, and I added about three inches in width, because the mesh is heavier than the one the existing dress was made of, and it would stretch less. That’s it. No darts, nothing more than shaped side seams. I zigzagged the seams first, tried it on,ย  then stitched in two different lengths to be sure the seams were strong. The seams stop at mid-thigh, allowing for plenty of movement.

Once the sheath dress was done, I simply draped two large pieces of the thinner mesh and pinned them at the shoulders until I was happy with where they lay. I wanted the front to drape over the center of the body, and the back to drape around and below it. The harness went on next, and was also pinned before checking for fit. I used steel rings at the shoulders, front and back as accents, and hand stitched everything with upholstery thread. The overdress is tacked at the sides of the harness too, since I don’t want it to shift.

It was very simple, which was fortunate because I didn’t give myself all that much time… heh.

It was a great success, fun and comfortable to dance in, and it looked great in the black lights!81427790_307408770184294_3831241025670610944_n81050294_688146525051074_2571697408912130048_n


The “Fetish al Fresco” Collection Monday, Dec 2 2019 

This is a bit of a saga… an obsession of sorts. I don’t recall where it was that I first saw it…most likely a Facebook ad, because they’re nosing into my search history. ๐Ÿ˜ Regardless of where it was, I saw this incredible fabric… this amazing pattern.

2019-10-14 (2).png

And I had to have it.

It is a fabric featured at Sin In Linen, a company specializing in unique and sassy prints for the bedroom and bathroom.

I began my Google search. I hit a lot of dead ends, and found a lot of lovely pastoral scenes of French countrysides. No luck. Finally, I found someone who had a couple yards of the fabric…. in white and *pink*. No.

I went back to Sin In Linen, gazing longingly at the sheet set. And drapes. And shower curtains… and I started thinking about how these products are really, mostly, large rectangular yardages of fabric. I got out my calculator, did some figuring, and decided on the purchase that would give me the most usable square footage per dollar. SOLD!
67887876_553950865145518_6777724118419636224_n
I planned to make a Victorian overskirt. Like you do! Truly Victorian pattern TV367.
*If you have NOT heard me rave about the TV patterns (and they don’t pay me to do so- I wish!) then check out some of my other posts.

The purchase was made: a queen sheet set, which should have been just enough. And still, I unpicked every seam and ironed them out to get every usable inch!

The only difficult part, really, was that due to the yardage, I had to make the center line of the front a seam instead of a fold. CHALLENGE!ย 

I laid out the fabric, figured in my seam allowance, lined it all up carefully, pinning and re-pinning…. and here we go:

After that, I finished the edges *before* doing the pleating… that’s a tip that will save you from working around annoying fabric folds just to turn or face an edge. Since this is such a light cotton and intended for a summery Victorian dress, I did not line it, and only faced the necessary edges. A bit of a time saver, and if it was something I planned to add trims to I would want the additional support of a lining or all over facing, especially with such a light fabric. But, I wasn’t.

Post-pleats on the front and back:

Upon completing the overskirt, I had planned to wear it with a black jacket and black underskirt, but I didn’t like the darkness of the resulting look. (I know, I know… me? Not liking how dark it was???)ย  So I hied me off to a thrift store, picked up some white cotton (blend) curtains with a little lace trim and made up a six panel skirt. I stitched on some black ribbon trim and faceted beads to pull it together with the black and white toile. The picture above is in bare feet- I wore three inch black boots with this skirt.

So.

Fast forward a year, and I had decided to make a dress from a vintage 1950’s pattern. I bought more material (sheets) and did a TERRIBLE job of taking pictures of this dress, both in the making and in the wearing. So here’s what you get:

67805289_959757204367464_7287057332205256704_n

It was quite the weekend.
After the creation of this epitome of mid-century grace and modesty, I thought that maybe, between the scraps from the first project and now from the dress, I *might* have enough to put together a Victorian bodice to go with the overskirt!

68887269_412101002758672_2280628059377762304_n.jpg

I hunted through my patterns and pulled outย  another TV beauty, one I hadn’t made yet.
I cut out the pattern pieces, laid out my fabric (I had enough!) and pinned it to the lining, cut out the pieces, and happily headed back to the pattern pouch to pull out the instructions.


…..68436586_606730133188665_426052432116580352_n.jpg67906138_3256747097670466_494184078153613312_n

Where are theย instructions??

They’re certainly not in that bag.

Not by the ironing board.

Oh no….


67970856_358629835077435_1700998115131129856_nI was not happy.


But, things as they are, right?

I did a brief, hopeless search online, just in case someone had posted the instructions for this particular pattern online.
No dice.

Well, you know what? I’ve made so many bodices at this point, I’m sure I can just read the pattern and figure it out, and it’ll all be just fine, right?

Right.

Plowing ahead, I followed standard procedure, stitching each seam twice (at two different lengths, for strength), then clipping curved seams and ironing them. I zigzagged the seams to finish instead of binding them- not as pretty, but it works. I opted against interior boning.67921333_2180786922033107_3899910551936958464_n67950526_648496062302976_5780516739028615168_n

I then faced the shoulder straps and the neckline before I set the sleeves.

I also faced and finished the lacing back, after checking the fit.

For the bottom edge I used white bias binding… mostly due to time constraints but also running low on the necessary fabric to make a proper self-fabric bias tape.

68441415_363329991012173_6909142498405253120_n

Looking good… time to set the sleeves and see how it all looks together!
The puffed sleeves went on without any issues. I added black matte grommets (size 0, I believe) around the sleeve band and at the neckline to insert different colored ribbon… a dress with this much print going on doesn’t need much adornment!

Putting it all together:
68518227_2265347750244789_1445315598148960256_n

And the final product, with ribbons, accessories and sass, at an event:

74682744_10220968099171382_5321161242168000512_o

Instructions? We don’t need no stinking instructions!! ๐Ÿ˜€

I have worn this both with and without a corset and bustle beneath, but of course with both is more accurate, and achieves the correct silhouette more fully.

Now, from a historical context, this is definitely a ballgown. The short sleeves paired with the low cut square neckline would require that this bodice be relegated to a formal evening event. And of course very long gloves would be needed, to maintain modesty. I’m *clearly* not interested in that. But I am wearing it as daytime wear, primarily due to the fabric I chose (even if we forget about that saucy pattern :D). the cotton is simply not fine enough in content or color to make it into a historically accurate piece of evening wear. although white lawn, a very finely woven linen or cotton was seen in (primarily) upper-class Regency clothing, that would still be summer apparel and usually considered daytime wear. So, this is not historically accurate, either in construction or fabric choice. But it was fun to make, and a lot of fun to wear!ย 

Next Page »