Hello friends and fanatics!
This blog has been pretty quiet on the “making” front, but if you’ve been paying attention, you know that doesn’t mean I haven’t been extremely busy on the creative end of things! Just over a year ago I took my business full-time, and am still working to get that to a comfortable point, inasmuch as self-employment can be comfortable. Besides that, I wrote a book in the last several months, and raised $10,000 to fund the initial publication run!
So, I have NOT been snoozing on the job!
However, those update posts, as exciting as they are for me, don’t provide much sustenance for my fans with an appetite for sartorial creations (or, at least until the book arrives! If you would like to check out “The Victorian Collection: Advanced costuming Techniques” but missed the Kickstarter, you can pre-order a copy here!)
I have made a few things- I’ve *started* more than a few- and I present a bit of a technical post here for you. You’ll see THIS corset through the finishing process!
The beginning of the corset-making process IS extremely important. It is essential to get cutting accurate to your careful measurements, to flatline your interlining, to allow for the thickness of fabric in how it will affect final measurements, and to stitch your seam allowances consistently.
However. It is the finishing of the corset that is usually considered intimidating. So I’m going to review the last few processes in the creation of a corset I recently made, and this post will feature something new… (drumroll, please!)
Video! Yes indeed, you can now see my work and the remnants of my manicure in live action!
Let’s begin. You’re joining me at the point where all my pieces have been cut out and I have flatlined the outer fabric, the interlining and the lining together. I decided to have the boning channels on the interior of this corset rather than sandwich them between two layers of interlining, or a coutil exterior and interlining. I have sewn all the pieces together, zigzag stitched the raw edges, clipped and pressed them, and this first image shows how I stitched the seams down initially on the left, and where the boning channels are applied along the seams on the right.

The insertion and sewing of the busk is a part of the finishing process, and must be done before the center front pieces are sewn to the rest of the pattern pieces. Similarly the center back of the corset, if you look closely, is sewn down the center with right sides together before being joined to the rest of the pieces. You’ll see why shortly!
To insert the busk, the center pieces must be sewn differently depending on whether you’re inserting the loop side or the hook side. With either side, you’ll lay the busk along the planned seam allowance with the pattern pieces laid right sides together. It’s good to do this with both sides at the same time, so you can be sure your markings are the same distance from the top and bottom. I usually put the hooks on the right side, but that’s a personal preference. Use chalk or a marking pen to mark the seam allowance along the hook side, and mark the position of each hook as well. On the loop side, mark the seam allowance right up to and around the loops…. You will sew RIGHT up to where each loop starts, backstitch for strength, then start again (backstitching again) on the other side of each loop. This leaves openings for the loops to go through when you turn the pieces right side out.
Once done sewing, press the seams open, then flat, ready for the busk. Insert the loop side of the busk into the appropriate fabric, pushing the loops through the openings you sewed. Use pins set perpendicular to the busk and get it as close and evenly placed along the edge as possible. On the hook side, you’re going to use an awl to make openings in the fabric for the hooks. At each marking, you’ll push the awl through and wiggle it to create an opening. You don’t want to cut a hole for the hooks, as that will weaken the fabric and leave you with fraying ends and ever-widening holes from being a stress point. I will even use Fraycheck on the holes once the hooks are inserted (do a stain test against your fabric with it ahead of time!)
This busk-adjusting, hole-wiggling part can be one of the most frustrating, so I made a short video showing how I approach it. Enjoy!
The process of busk insertion and making the hook openings.
SO! The busk is done, you’ve stitched along those perpendicular pins, it looks fantastic. Great! that’s ONE finishing process done! Before moving on to the top binding, I stitched in two rows of boning channel at either center back, about 5/8″ from the edge. Why? Because there are sufficient layers within that first 5/8″ to encase the 1/2″ steel bone along the edge, but then I want reinforcement for the grommets, and another steel bone on the other side of the grommets. There are several ways you can do this reinforcement, even to add a couple inches to the interlining when cutting your pieces and already have it sandwiched in. I just chose this method, this time. You can see these two boning channels very clearly in a couple of the upcoming images.
At this point, I would stitch across the top of the corset. Then, taking a strip of binding tape or fashion fabric, I lay it good sides together long the top edge of both corset sides. Zigzag stitch for security, and then I double fold it over and pin it to the inside of the corset. Sometimes I will machine stitch this from the other side, but for this corset I chose to hand-stitch the binding. It tends to look neater, and I had a bit more maneuvering to do with a band of metallic trim I added to the front. Once the top edge is done, I insert the boning from the bottom, stitch along the bottom edge and repeat the same process from the top binding.


The last step is the grommets. Use two part grommets, and the right tools:

Placement of the grommets is a personal choice, but I definitely recommend measuring and marking ahead. My first grommeted corset was made with grommets 1″ apart, and that seemed excessive for lacing. I now place my grommets 1.5″ apart from each grommet center. I do cut holes for the grommets, as the holes is finished so completely by the closing of the grommet sides…. and because trying to use an awl to wiggle out holes that large would take HOURS. When applying the grommets, I recommend a rubber mallet, but if you don’t have one a hammer works- just always use eye protection!!
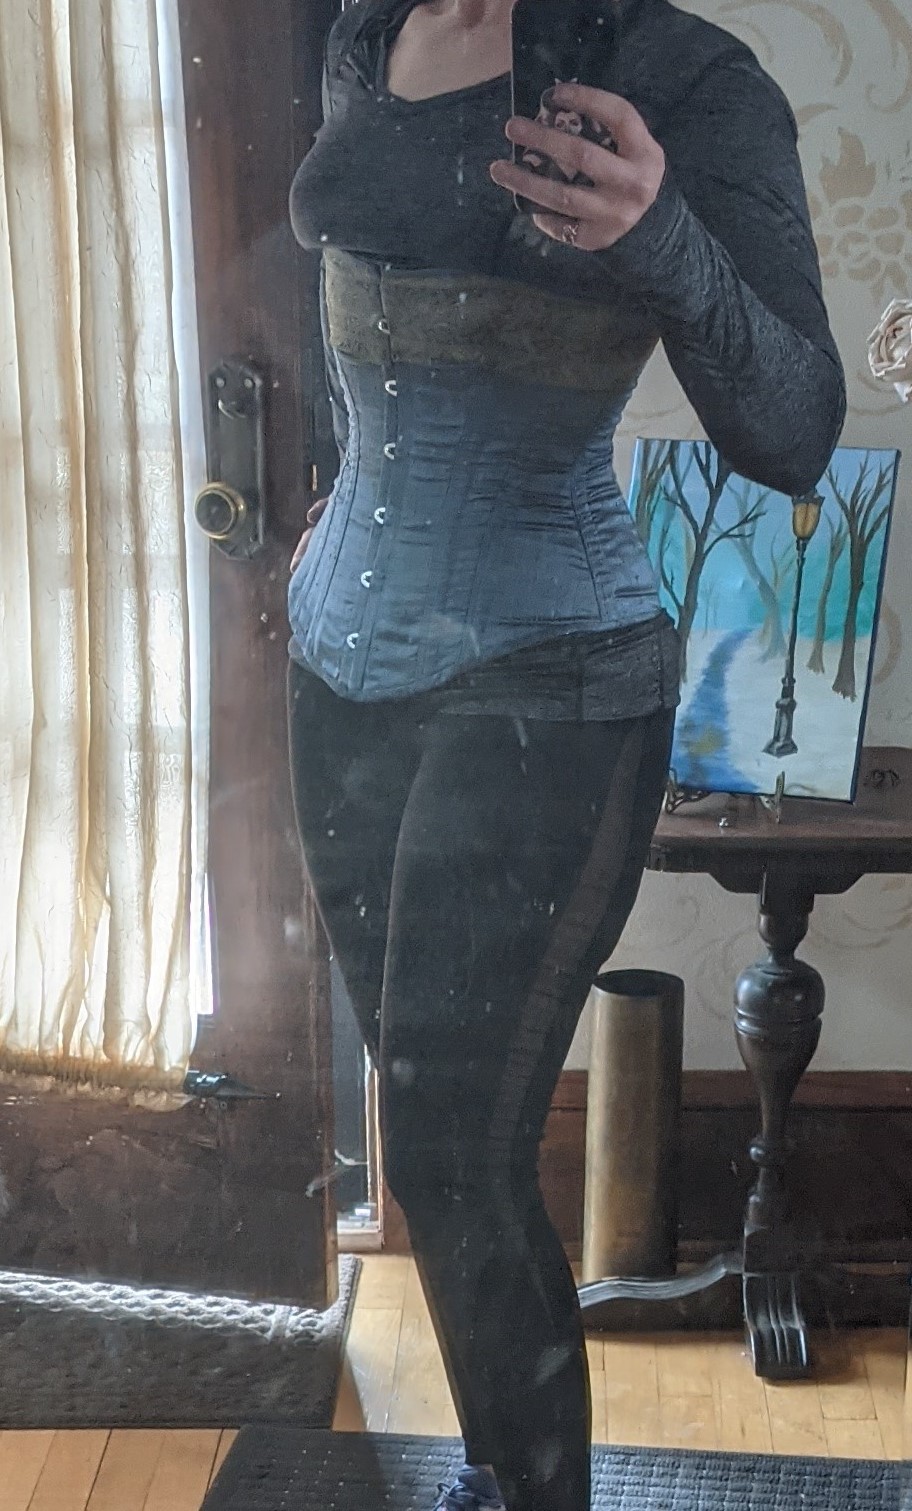
At 1.5″ from center, this is the result:

Some side notes: This corset is intended to be part of a final look, the design of which I have not settled on, so there may be a sequel to this post! Also, I swear I took photos and video from the first half of the creation of it as well, so there may be a prequel!
And finally, I used a vintage corset pattern which I have used previously for undergarments for Steampunk fashion shows, and I forgot that I tend to have a longer torso than the standard vintage patterns I’ve seen. So this pattern was for an over-bust (barely over though), for those noticing the curves on the center front pieces. I chose not to rework the pattern because I’d cut out the silk lining years ago and really wanted to use it.

